
If you’ve been watching AI features land in apps left and right and wondering how to add the same capability to your own Android projects — this is where you start. The Gemini API gives you access to Google’s most capable AI models, and as of 2026, the correct way to integrate it into an Android app is through the Firebase AI Logic SDK — Google’s official, actively maintained path for Android developers.
I’m Md Sharif Mia, and when I first tried getting Gemini running in a side project, I wasted a solid afternoon following tutorials that pointed me toward a library Google had already deprecated. The old com.google.ai.client.generativeai client SDK was officially deprecated in 2024. If you’re seeing it recommended anywhere in 2026, close that tab. This tutorial uses the modern Firebase AI Logic SDK — which is what Google actually wants you to use today.
By the end of this guide, you’ll have a working Android app that sends a prompt to the Gemini API and displays the response — set up correctly, securely, and built on a foundation that won’t be obsolete in six months. I’m testing everything here on Android Studio Meerkat, API 35 emulator, Kotlin 2.0.21.



Table of Contents
Why Firebase AI Logic SDK — Not the Old Client SDK
Before writing a single line of code, this distinction matters a lot and most tutorials in 2026 still get it wrong.
Google deprecated the standalone com.google.ai.client.generativeai library in 2024 and consolidated Gemini access for Android into two official paths:
- Firebase AI Logic SDK — the recommended path for Android and mobile apps, integrated with Firebase’s ecosystem, actively maintained and updated
- Vertex AI REST API — server-side access for backend and production infrastructure
For Android development, Firebase AI Logic is the correct choice. It gives you Kotlin coroutine support, clean model initialization, multimodal capabilities, and active long-term support from Google. According to the official Android documentation, Firebase is the recommended integration layer for Gemini on mobile.
Personally, I think this is the right call from Google’s side. Tying Gemini access into Firebase gives you a single SDK to manage authentication, analytics, and AI — rather than juggling separate dependencies. The setup takes a few extra minutes compared to the old client SDK, but the stability and future-proofing are worth every second.
This guide doesn’t cover Vertex AI server-side integration or the Gemini REST API directly — those are backend topics that deserve their own dedicated articles.
Step 1 — Get Your API Key and Set Up Firebase
You need two things before touching Android Studio: a Gemini API key and a Firebase project.
Get Your Gemini API Key
- Go to Google AI Studio
- Sign in with your Google account
- Click Get API Key in the left sidebar
- Click Create API key and select or create a Google Cloud project
- Copy the generated key — you’ll need it shortly
The free tier is genuinely generous for development and testing. No credit card required to follow this tutorial.
Create a Firebase Project
- Go to the Firebase Console
- Click Add project and follow the setup wizard
- Once the project is created, click Add app and select the Android icon
- Enter your app’s package name (e.g.,
com.example.geminidemo) - Download the generated
google-services.jsonfile - Place
google-services.jsonin your app’s/appdirectory — not the project root
This JSON file is how your Android app authenticates with Firebase. Keep it out of public repositories — add it to your .gitignore if you’re working on an open-source project.
Step 2 — Configure Your Android Project
Open Android Studio and create a new project. Choose Empty Activity, set the language to Kotlin, and set the minimum SDK to API 21.
Project-Level build.gradle.kts
Open your project-level build.gradle.kts and add the Google Services plugin:
// build.gradle.kts (Project level)
// Adds Google Services plugin required for Firebase initialization

plugins {
    alias(libs.plugins.android.application) apply false
    alias(libs.plugins.kotlin.android) apply false
    // Add the Google Services plugin
    id("com.google.gms.google-services") version "4.4.2" apply false
}settings.gradle.kts
Make sure your repositories include Google’s Maven:
// settings.gradle.kts
// Repository configuration — Google Maven required for Firebase SDK

dependencyResolutionManagement {
    repositories {
        google()
        mavenCentral()
    }
}App-Level build.gradle.kts
Open your app-level build.gradle.kts and add the Firebase AI Logic dependency:
// build.gradle.kts (App level)
// Firebase AI Logic SDK for Gemini API access on Android

plugins {
    id("com.android.application")
    id("org.jetbrains.kotlin.android")
    // Apply the Google Services plugin here
    id("com.google.gms.google-services")
}

android {
    // ... your existing config

    buildFeatures {
        buildConfig = true
        compose = true
    }

    composeOptions {
        kotlinCompilerExtensionVersion = "1.5.14"
    }
}

dependencies {
    // Firebase BoM — manages all Firebase library versions automatically
    // Always use the BoM rather than specifying individual versions
    implementation(platform("com.google.firebase:firebase-bom:33.7.0"))

    // Firebase AI Logic SDK — the modern Gemini integration for Android
    implementation("com.google.firebase:firebase-ai")

    // Kotlin coroutines
    implementation("org.jetbrains.kotlinx:kotlinx-coroutines-android:1.8.1")

    // ViewModel and Lifecycle
    implementation("androidx.lifecycle:lifecycle-viewmodel-ktx:2.8.7")
    implementation("androidx.lifecycle:lifecycle-runtime-ktx:2.8.7")

    // Jetpack Compose
    implementation(platform("androidx.compose:compose-bom:2024.12.01"))
    implementation("androidx.compose.ui:ui")
    implementation("androidx.compose.material3:material3")
    implementation("androidx.activity:activity-compose:1.9.3")
}Always use the Firebase BoM (Bill of Materials) to manage Firebase library versions — at the time of writing this is 33.7.0, but the principle stays the same regardless of which version you’re on. The BoM ensures all Firebase libraries stay compatible with each other without you manually tracking individual version numbers.
Sync your project. If Gradle syncs without errors, move to Step 3.
What you should see: Gradle sync completes successfully. Your google-services.json is recognized — if Firebase can’t find it, you’ll see a build error saying the file is missing. Double-check it’s inside the /app directory, not the project root.
Step 3 — Store Your API Key Securely
Never hardcode your Gemini API key directly in your source code. This is one of the most common mistakes developers make — and it’s completely silent until someone finds your key in a public repository and drains your quota.
The correct approach is local.properties combined with BuildConfig. This file is excluded from version control by Android Studio’s default .gitignore.
Open local.properties in your project root and add:
# local.properties — never commit this file to version control
geminiApiKey=YOUR_ACTUAL_API_KEY_HERE
Now in your app-level build.gradle.kts, read the key and inject it into BuildConfig:
// app/build.gradle.kts — inside the android > defaultConfig block
// Reads API key from local.properties and makes it available as BuildConfig field

android {
    defaultConfig {
        // ... existing config

        val properties = org.jetbrains.kotlin.konan.properties.Properties()
        properties.load(project.rootProject.file("local.properties").inputStream())

        buildConfigField(
            "String",
            "GEMINI_API_KEY",
            "\"${properties.getProperty("geminiApiKey") ?: ""}\""
        )
    }
}After syncing, BuildConfig.GEMINI_API_KEY is available anywhere in your Kotlin code. If you want to go deeper on API key protection strategies — including runtime approaches using the Android Keystore — the How to Secure API Keys in Android Studio post on KtDevLog covers the full security spectrum.
Watch out — if you forget to rebuild the project after adding the buildConfigField, you’ll get a “cannot resolve symbol BuildConfig.GEMINI_API_KEY” error even though everything looks correct. Clean and rebuild before assuming something is broken.
What you should see: BuildConfig.GEMINI_API_KEY resolves without errors in your Kotlin files. If you see a red underline, go to Build → Clean Project → Rebuild Project.
Step 4 — Initialize the Firebase AI Logic SDK and Send Your First Prompt
Create a new Kotlin file called GeminiRepository.kt:
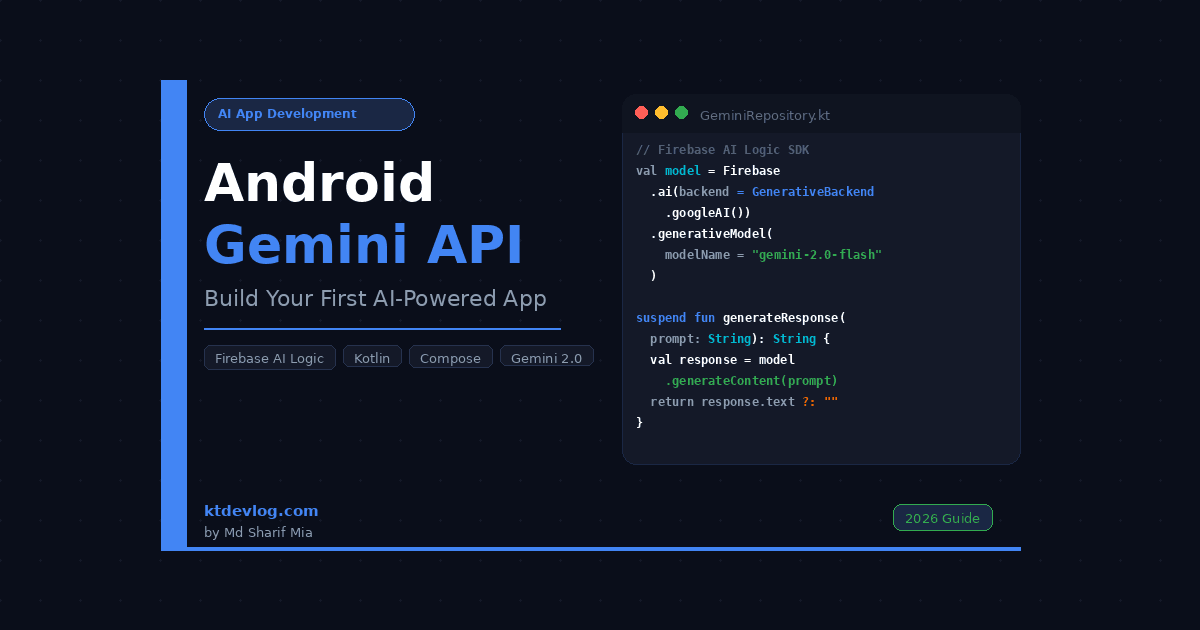
// GeminiRepository.kt
// Handles all Gemini API communication via the Firebase AI Logic SDK

import com.google.firebase.Firebase
import com.google.firebase.ai.ai
import com.google.firebase.ai.type.GenerativeBackend
import com.google.firebase.ai.type.generationConfig

class GeminiRepository {

    // Initialize Firebase AI with the Gemini Developer API backend
    private val model = Firebase.ai(backend = GenerativeBackend.googleAI())
        .generativeModel(
            modelName = "gemini-2.0-flash",
            generationConfig = generationConfig {
                temperature = 0.7f
                maxOutputTokens = 1024
            }
        )

    // Suspend function — must be called from a coroutine scope
    suspend fun generateResponse(prompt: String): String {
        return try {
            val response = model.generateContent(prompt)
            response.text ?: "No response received"
        } catch (e: Exception) {
            "Error: ${e.message}"
        }
    }
}A few things worth explaining here. GenerativeBackend.googleAI() tells the SDK to use the Gemini Developer API — which is what your API key from Google AI Studio authenticates against. The model name gemini-2.0-flash is Google’s current recommended model for Android apps as of May 2026 — fast, efficient, and well within free tier limits.
The temperature of 0.7f is a balanced starting point. Lower values make responses more precise and factual. Higher values introduce more creativity and variation. For most Android app use cases, 0.7f is the right default.
Now create MainViewModel.kt to manage UI state:
// MainViewModel.kt
// Manages UI state and calls GeminiRepository on a background coroutine

import androidx.lifecycle.ViewModel
import androidx.lifecycle.viewModelScope
import kotlinx.coroutines.flow.MutableStateFlow
import kotlinx.coroutines.flow.StateFlow
import kotlinx.coroutines.launch

class MainViewModel : ViewModel() {

    private val repository = GeminiRepository()

    private val _uiState = MutableStateFlow<UiState>(UiState.Idle)
    val uiState: StateFlow<UiState> = _uiState

    fun sendPrompt(prompt: String) {
        _uiState.value = UiState.Loading

        viewModelScope.launch {
            val response = repository.generateResponse(prompt)
            _uiState.value = UiState.Success(response)
        }
    }
}

// Sealed class representing every possible UI state
sealed class UiState {
    object Idle : UiState()
    object Loading : UiState()
    data class Success(val response: String) : UiState()
    data class Error(val message: String) : UiState()
}What you should see: Both files compile without errors. The UiState sealed class gives the compiler exhaustive knowledge of every possible state — which means when expressions on it never need an else branch.
Step 5 — Build the Compose UI
Wire everything together in MainActivity.kt:
// MainActivity.kt
// Entry point — connects ViewModel state to the Compose UI

import android.os.Bundle
import androidx.activity.ComponentActivity
import androidx.activity.compose.setContent
import androidx.activity.viewModels
import androidx.compose.foundation.layout.*
import androidx.compose.foundation.rememberScrollState
import androidx.compose.foundation.verticalScroll
import androidx.compose.material3.*
import androidx.compose.runtime.*
import androidx.compose.ui.Alignment
import androidx.compose.ui.Modifier
import androidx.compose.ui.unit.dp

class MainActivity : ComponentActivity() {

    private val viewModel: MainViewModel by viewModels()

    override fun onCreate(savedInstanceState: Bundle?) {
        super.onCreate(savedInstanceState)
        setContent {
            MaterialTheme {
                GeminiScreen(viewModel = viewModel)
            }
        }
    }
}

@Composable
fun GeminiScreen(viewModel: MainViewModel) {
    val uiState by viewModel.uiState.collectAsState()
    var prompt by remember { mutableStateOf("") }

    Column(
        modifier = Modifier
            .fillMaxSize()
            .padding(16.dp)
            .verticalScroll(rememberScrollState()),
        verticalArrangement = Arrangement.spacedBy(12.dp)
    ) {
        Text(
            text = "Gemini AI Demo",
            style = MaterialTheme.typography.headlineMedium
        )

        OutlinedTextField(
            value = prompt,
            onValueChange = { prompt = it },
            label = { Text("Enter your prompt") },
            modifier = Modifier.fillMaxWidth(),
            minLines = 3
        )

        Button(
            onClick = { viewModel.sendPrompt(prompt) },
            modifier = Modifier.align(Alignment.End),
            enabled = prompt.isNotBlank() && uiState !is UiState.Loading
        ) {
            Text("Send to Gemini")
        }

        when (val state = uiState) {
            is UiState.Loading -> CircularProgressIndicator(
                modifier = Modifier.align(Alignment.CenterHorizontally)
            )
            is UiState.Success -> Card(
                modifier = Modifier.fillMaxWidth()
            ) {
                Text(
                    text = state.response,
                    modifier = Modifier.padding(16.dp),
                    style = MaterialTheme.typography.bodyMedium
                )
            }
            else -> Unit
        }
    }
}Run the app on your emulator or physical device. Type any prompt, tap Send to Gemini, and within a couple of seconds you should see the AI response appear in the card.
What you should see: The app launches cleanly. Typing a prompt and tapping the button disables the button and shows a loading spinner. After 1–3 seconds, the spinner disappears and the Gemini response displays in the card below. If you see a crash on launch, Firebase likely can’t find your google-services.json — verify it’s in the /app directory and rebuild.
Common Errors & Fixes
These are the real errors you’ll hit when first setting up Firebase AI Logic on Android.
Error: google-services.json not found during build The file must be inside your /app directory — not the project root. Android Studio’s project view can be misleading. Switch to the Project file view (not Android view) to confirm the exact location.
Error: FirebaseApp is not initialized You’re missing the Google Services plugin in either your project-level or app-level build.gradle.kts. Check both files have the plugin applied correctly as shown in Step 2.
Error: API_KEY_INVALID or 400 response Your API key from Google AI Studio wasn’t read correctly from local.properties. Check for leading or trailing whitespace in the key value, and confirm BuildConfig.GEMINI_API_KEY is not an empty string by logging it temporarily during development.
Error: Cannot find symbol: BuildConfig.GEMINI_API_KEY The BuildConfig class needs regeneration. Go to Build → Clean Project, then Build → Rebuild Project. This resolves 95% of BuildConfig symbol errors.
Error: App builds but response is always empty Check that response.text is not null — some prompts that violate safety filters return a non-null response object but with a null text field. Add logging to inspect the full response object during debugging.
Error: GenerativeBackend cannot be resolved You’re using an outdated version of the Firebase AI SDK. Make sure your Firebase BoM is 33.7.0 or later and sync your project again.
FAQ
Is the Firebase AI Logic SDK free to use?
Yes — the Gemini Developer API tier accessed through Google AI Studio is free with generous rate limits, which is more than sufficient for development and small-scale apps. For high-traffic production apps, you’ll want to evaluate Vertex AI pricing. For learning and building, the free tier handles everything in this tutorial comfortably.
What happened to the old com.google.ai.client.generativeai library?
Google deprecated it in 2024 and consolidated Android Gemini access into the Firebase AI Logic SDK. If you have existing projects using the old library, Google provides a migration guide in the official Firebase documentation. Don’t build new projects on the deprecated library — it receives no new features and will eventually stop being maintained entirely.
Can I use the Firebase AI Logic SDK without Jetpack Compose?
Yes. The Firebase AI SDK is a pure Kotlin library with no dependency on Compose. You can use it identically with traditional Views, Fragments, or any architecture pattern. The GeminiRepository class in this tutorial works regardless of your UI layer — just call it from whatever ViewModel or presenter you’re using.
How do I switch from gemini-2.0-flash to a different model?
Change the modelName string in your GeminiRepository. Common options include gemini-2.0-flash for speed, gemini-1.5-pro for more complex reasoning tasks, and gemini-2.0-pro-exp for experimental capabilities. Always check the official model documentation for the current list of available models and their capabilities.
Does this setup work for multimodal inputs like images?
Yes — the Firebase AI Logic SDK supports text, images, audio, and video inputs. This tutorial covers text-only to keep the setup focused. Sending images alongside text prompts uses the same generateContent function with a different input type. I cover image analysis with the Gemini Vision API in a dedicated post on KtDevLog.
What You’ve Built — and Where to Go Next
You now have a working Android app connected to the Gemini API using the correct, modern Firebase AI Logic SDK. You’ve configured Firebase, secured your API key properly, initialized the generative model with sensible defaults, wired it to a ViewModel with clean state management, and built a Compose UI that handles every state correctly.
This foundation is solid enough to build real AI-powered features on. The next logical step is turning this into a proper conversational experience — with message history, a scrollable chat list, and a UI that feels like a real AI assistant. That’s exactly what the next post covers: How to Build an AI Chatbot in Android using Jetpack Compose.
The hardest part of building AI-powered Android apps in 2026 isn’t the AI itself — it’s navigating which SDK is actually current and which tutorials are already outdated. Now you know exactly where to start, and more importantly, why.
Always test in your own environment before using in production.