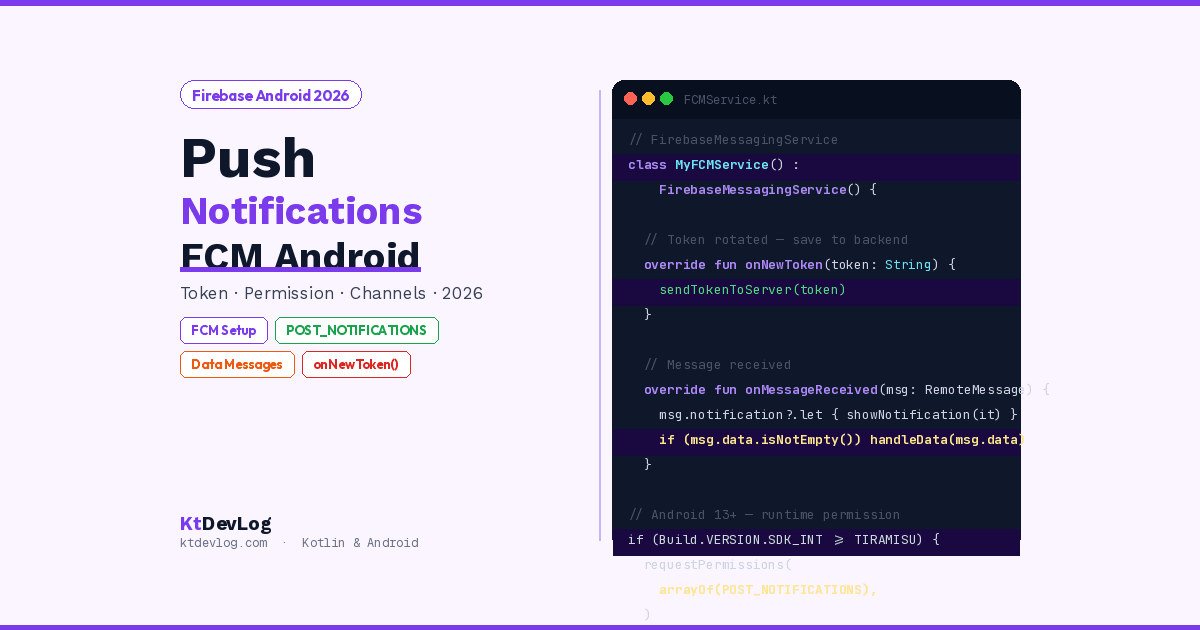

Your app does something useful. A new message arrives. A friend completes a task. A payment succeeds. A breaking event happens. The user is not looking at their phone — but your app can still reach them.
That’s push notifications. And in Android, Firebase Cloud Messaging (FCM) is how you build them.
This firebase push notifications android tutorial covers everything you need for a production-ready FCM implementation in 2026 — Firebase project setup, the FirebaseMessagingService, notification channels (required since Android 8), the POST_NOTIFICATIONS runtime permission (required since Android 13), notification vs data messages, topic subscriptions, FCM token management, and testing your setup without writing any server code.
There’s more complexity here than most tutorials admit. Android 16 introduced an AI-powered Notification Organizer that can silently suppress low-priority notifications. Android 13 made notification permission a runtime grant, not a default. Getting notifications to actually appear on users’ screens in 2026 requires more than just copy-pasting the FCM SDK. This guide covers all of it.
Table of Contents
How Firebase Cloud Messaging Works
Before writing code, understanding the flow prevents confusion later.
Your Server / Firebase Console
        ↓
FCM Servers (Google's infrastructure)
        ↓
Device FCM Client (runs on user's phone)
        ↓
Your App (FirebaseMessagingService)
        ↓
Notification displayed to user
FCM is a relay service — you send a message to Google’s FCM servers, they deliver it to the right device. Each device has a unique FCM registration token that identifies it. Your server stores these tokens and uses them to send messages to specific devices, or you use topics to send to groups of devices at once.
Two types of messages — understanding this distinction is critical:
Notification messages — FCM builds and shows the notification automatically. Simple, fast. But when the app is in the foreground, FCM doesn’t show the notification — you must handle it yourself in onMessageReceived().
Data messages — FCM delivers a key-value payload to your app. Your app always receives it in onMessageReceived() regardless of foreground/background state. Your app builds and shows the notification. More work, more control.
According to the official FCM documentation, updated April 2026, the combination — a notification message with a data payload — gives you the best of both: automatic display when in background, with custom data available when the user taps it.
Step 1 — Firebase Project Setup
If you already have a Firebase project from the Firebase Authentication guide, your google-services.json is already in place. Just enable Cloud Messaging and add the dependency.
If starting fresh:
- Go to console.firebase.google.com
- Create or open your project
- Add your Android app — download
google-services.jsonto yourapp/directory - Firebase Cloud Messaging is enabled by default for all Firebase projects — no extra setup needed in the console
Step 2 — Dependencies
// app/build.gradle.kts
plugins {
    id("com.google.gms.google-services")
}

dependencies {
    // Firebase BoM — manages all Firebase library versions
    implementation(platform("com.google.firebase:firebase-bom:34.12.0"))
    implementation("com.google.firebase:firebase-messaging")

    // Activity Result API — for permission request in Compose
    implementation("androidx.activity:activity-compose:1.10.1")
}Using the Firebase BoM means you never specify version numbers for individual Firebase libraries — the BoM ensures all Firebase dependencies are compatible with each other automatically.
Step 3 — AndroidManifest.xml Setup
<!-- AndroidManifest.xml -->
<manifest xmlns:android="http://schemas.android.com/apk/res/android">

    <!-- Required for Android 13+ (API 33+) -->
    <!-- FCM SDK 23.0.6+ includes this automatically, but explicit is better -->
    <uses-permission android:name="android.permission.POST_NOTIFICATIONS"/>
    <uses-permission android:name="android.permission.INTERNET" />

    <application ...>

        <!-- Your FirebaseMessagingService -->
        <service
            android:name=".MyFirebaseMessagingService"
            android:exported="false">
            <intent-filter>
                <action android:name="com.google.firebase.MESSAGING_EVENT" />
            </intent-filter>
        </service>

        <!-- Default notification channel ID — used when message doesn't specify one -->
        <meta-data
            android:name="com.google.firebase.messaging.default_notification_channel_id"
            android:value="@string/default_notification_channel_id" />

        <!-- Custom notification icon — shown in status bar -->
        <meta-data
            android:name="com.google.firebase.messaging.default_notification_icon"
            android:resource="@drawable/ic_notification" />

        <!-- Notification accent colour -->
        <meta-data
            android:name="com.google.firebase.messaging.default_notification_color"
            android:resource="@color/notification_color" />

    </application>
</manifest>android:exported="false" on the FirebaseMessagingService — critical for security. This ensures only Google Play Services on the device can trigger your service. Without it, any app on the device could send fake FCM messages to your service.
Add to res/values/strings.xml:
<string name="default_notification_channel_id">ktdevlog_channel</string>Step 4 — Create Notification Channels (Required Since Android 8)
Notification channels have been mandatory since Android 8.0 (API 26). Every notification must belong to a channel. Users can control notification behaviour per channel — disable only marketing notifications while keeping alerts for messages, for example.
Create channels in your Application class — this ensures they exist before any notification arrives:
// KtDevLogApp.kt
import android.app.Application
import android.app.NotificationChannel
import android.app.NotificationManager
import android.os.Build

class KtDevLogApp : Application() {

    override fun onCreate() {
        super.onCreate()
        createNotificationChannels()
    }

    private fun createNotificationChannels() {
        if (Build.VERSION.SDK_INT >= Build.VERSION_CODES.O) {

            val notificationManager = getSystemService(NotificationManager::class.java)

            // Main alerts channel — high importance, shows heads-up notifications
            val alertsChannel = NotificationChannel(
                "ktdevlog_alerts",
                "Important Alerts",
                NotificationManager.IMPORTANCE_HIGH
            ).apply {
                description = "Critical alerts and urgent notifications"
                enableLights(true)
                enableVibration(true)
            }

            // General channel — default importance
            val generalChannel = NotificationChannel(
                "ktdevlog_channel",
                "General Notifications",
                NotificationManager.IMPORTANCE_DEFAULT
            ).apply {
                description = "Updates, news, and general notifications"
            }

            // Silent updates channel — low importance, no sound
            val silentChannel = NotificationChannel(
                "ktdevlog_silent",
                "Silent Updates",
                NotificationManager.IMPORTANCE_LOW
            ).apply {
                description = "Background sync and silent data updates"
            }

            notificationManager.createNotificationChannels(
                listOf(alertsChannel, generalChannel, silentChannel)
            )
        }
    }
}Register it in AndroidManifest.xml:
<application
    android:name=".KtDevLogApp"
...>Why create multiple channels? Users can configure each channel separately in Settings. If you only have one channel and users disable it, they lose all your notifications. Multiple channels let users silence only what they don’t want.
Important 2026 note: Android 16 introduced AI-powered Notification Summaries that can group and suppress lower-importance notifications. Using IMPORTANCE_HIGH for genuinely critical alerts ensures they break through the organiser. Using IMPORTANCE_DEFAULT for general updates respects the system’s grouping decisions.
Step 5 — FirebaseMessagingService
This is the heart of your FCM implementation — the service that receives all push messages:
// MyFirebaseMessagingService.kt
import android.app.NotificationManager
import android.app.PendingIntent
import android.content.Intent
import androidx.core.app.NotificationCompat
import com.google.firebase.messaging.FirebaseMessagingService
import com.google.firebase.messaging.RemoteMessage

class MyFirebaseMessagingService : FirebaseMessagingService() {

    // ── Token Management ────────────────────────────────────────
    override fun onNewToken(token: String) {
        super.onNewToken(token)
        // Called when FCM generates a new token — on first launch and whenever it rotates
        sendTokenToServer(token)
        android.util.Log.d("FCM", "New token: $token")
    }

    private fun sendTokenToServer(token: String) {
        // TODO: Send this token to your backend via Retrofit/API call
        // This is what enables sending notifications to this specific device
        // Store it per-user in your database (Firestore, your own server)
    }

    // ── Message Handling ────────────────────────────────────────
    override fun onMessageReceived(remoteMessage: RemoteMessage) {
        super.onMessageReceived(remoteMessage)

        // Message has a notification payload — show it
        remoteMessage.notification?.let { notification ->
            showNotification(
                title   = notification.title ?: "KtDevLog",
                body    = notification.body  ?: "",
                channelId = notification.channelId ?: "ktdevlog_channel"
            )
        }

        // Message has a data payload — process custom key-value pairs
        if (remoteMessage.data.isNotEmpty()) {
            handleDataPayload(remoteMessage.data)
        }
    }

    private fun handleDataPayload(data: Map<String, String>) {
        val action   = data["action"]
        val deeplink = data["deeplink"]
        val title    = data["title"] ?: "KtDevLog"
        val message  = data["message"] ?: ""

        when (action) {
            "new_message"   -> showNotification(title, message, "ktdevlog_alerts")
            "silent_update" -> performSilentUpdate(data)     // No notification shown
            else            -> showNotification(title, message, "ktdevlog_channel")
        }

        android.util.Log.d("FCM", "Data payload received: action=$action, deeplink=$deeplink")
    }

    private fun performSilentUpdate(data: Map<String, String>) {
        // Handle background data sync without showing any notification
        android.util.Log.d("FCM", "Silent update: ${data["update_type"]}")
    }

    // ── Build and Show Notification ─────────────────────────────
    private fun showNotification(title: String, body: String, channelId: String) {
        val notificationId = System.currentTimeMillis().toInt()

        // Intent to open the app when notification is tapped
        val intent = Intent(this, MainActivity::class.java).apply {
            flags = Intent.FLAG_ACTIVITY_NEW_TASK or Intent.FLAG_ACTIVITY_CLEAR_TASK
        }
        val pendingIntent = PendingIntent.getActivity(
            this,
            notificationId,
            intent,
            PendingIntent.FLAG_ONE_SHOT or PendingIntent.FLAG_IMMUTABLE   // FLAG_IMMUTABLE required on API 31+
        )

        val notification = NotificationCompat.Builder(this, channelId)
            .setSmallIcon(R.drawable.ic_notification)
            .setContentTitle(title)
            .setContentText(body)
            .setStyle(NotificationCompat.BigTextStyle().bigText(body))    // Expandable text
            .setContentIntent(pendingIntent)
            .setAutoCancel(true)     // Dismiss notification when tapped
            .setPriority(NotificationCompat.PRIORITY_DEFAULT)
            .build()

        val notificationManager = getSystemService(NotificationManager::class.java)
        notificationManager.notify(notificationId, notification)
    }
}onNewToken(token) — when to call it: This fires on first app launch and whenever FCM rotates the token. Token rotation happens when: the app is restored on a new device, the user uninstalls and reinstalls the app, or the user clears app data. Your backend must always store the latest token — stale tokens cause delivery failures silently.
Why System.currentTimeMillis().toInt() as notification ID: Using a time-based ID ensures each notification gets a unique ID, so multiple rapid notifications don’t replace each other. If you used a fixed ID like 1, the second notification would replace the first silently.
PendingIntent.FLAG_IMMUTABLE — mandatory since Android 12 (API 31). All PendingIntent objects must specify mutability explicitly. Use FLAG_IMMUTABLE unless you specifically need the intent to be modified later.
Step 6 — POST_NOTIFICATIONS Permission for Android 13+
This is the step that most FCM tutorials written before 2023 completely skip — and it’s the reason many apps’ notifications silently fail on newer Android versions.
Since Android 13 (API 33), notification permission is a runtime permission that the user must explicitly grant. Without it, no notifications appear — no errors, no warnings, just silence.
// NotificationPermissionHelper.kt
import android.Manifest
import android.content.pm.PackageManager
import android.os.Build
import androidx.activity.result.contract.ActivityResultContracts
import androidx.appcompat.app.AppCompatActivity
import androidx.core.content.ContextCompat

class NotificationPermissionHelper(private val activity: AppCompatActivity) {

    private val requestPermissionLauncher = activity.registerForActivityResult(
        ActivityResultContracts.RequestPermission()
    ) { isGranted ->
        if (isGranted) {
            onPermissionGranted()
        } else {
            onPermissionDenied()
        }
    }

    fun requestNotificationPermission(
        onGranted: () -> Unit = {},
        onDenied: () -> Unit  = {}
    ) {
        // Only needed on Android 13+
        if (Build.VERSION.SDK_INT < Build.VERSION_CODES.TIRAMISU) {
            onGranted()    // Older Android versions don't need explicit permission
            return
        }

        when {
            // Already granted
            ContextCompat.checkSelfPermission(
                activity,
                Manifest.permission.POST_NOTIFICATIONS
            ) == PackageManager.PERMISSION_GRANTED -> {
                onGranted()
            }

            // Should show rationale — user previously denied
            activity.shouldShowRequestPermissionRationale(Manifest.permission.POST_NOTIFICATIONS) -> {
                showRationaleDialog(onGranted)
            }

            // Request permission — first time asking
            else -> {
                requestPermissionLauncher.launch(Manifest.permission.POST_NOTIFICATIONS)
            }
        }
    }

    private fun onPermissionGranted() {
        android.util.Log.d("FCM", "Notification permission granted")
    }

    private fun onPermissionDenied() {
        android.util.Log.d("FCM", "Notification permission denied")
        // Don't force — respect the user's decision
        // Consider showing an in-app banner explaining what they're missing
    }

    private fun showRationaleDialog(onGranted: () -> Unit) {
        android.app.AlertDialog.Builder(activity)
            .setTitle("Enable Notifications")
            .setMessage("Allow KtDevLog to send you updates about new Kotlin and Android tutorials, tips, and alerts.")
            .setPositiveButton("Enable") { _, _ ->
                requestPermissionLauncher.launch(Manifest.permission.POST_NOTIFICATIONS)
            }
            .setNegativeButton("Not now", null)
            .show()
    }
}Using It in Compose With Activity Result API
// In your MainActivity or a Composable
@Composable
fun RequestNotificationPermission() {
    val context = LocalContext.current

    // Only request on Android 13+
    if (Build.VERSION.SDK_INT >= Build.VERSION_CODES.TIRAMISU) {

        val permissionState = rememberPermissionState(
            android.Manifest.permission.POST_NOTIFICATIONS
        )

        LaunchedEffect(Unit) {
            if (!permissionState.status.isGranted && !permissionState.status.shouldShowRationale) {
                permissionState.launchPermissionRequest()
            }
        }
    }
}Three critical rules for Android 13+ permission:
- Request at the right moment — not on first launch. Ask when the user does something that implies they want notifications (enabling a notification preference in settings, subscribing to updates, completing onboarding). Context makes users far more likely to grant permission.
- Never ask twice without rationale — after the first denial, Android won’t show the system dialog again for
POST_NOTIFICATIONSif you callrequestPermissions()a second time. Show your own rationale dialog explaining the benefit before triggering the system request.
- Gracefully handle denial — your app must work without notifications. Show an in-app message explaining what the user is missing, not a blocking screen that prevents app use.
Step 7 — Get the FCM Token
For targeted notifications (sending to a specific user’s device), you need their FCM token. Get it programmatically:
// In your MainActivity or a setup function
import com.google.firebase.messaging.FirebaseMessaging

fun getFCMToken() {
    FirebaseMessaging.getInstance().token
        .addOnCompleteListener { task ->
            if (!task.isSuccessful) {
                android.util.Log.w("FCM", "Fetching FCM token failed", task.exception)
                return@addOnCompleteListener
            }
            val token = task.result
            android.util.Log.d("FCM", "FCM Token: $token")
            // Save to your Firestore user document or backend
            saveTokenToDatabase(token)
        }
}

fun saveTokenToDatabase(token: String) {
    // Example: save to Firestore under the current user's document
    val userId = com.google.firebase.auth.FirebaseAuth.getInstance().currentUser?.uid ?: return
    com.google.firebase.firestore.FirebaseFirestore.getInstance()
        .collection("users")
        .document(userId)
        .update("fcmToken", token)
        .addOnSuccessListener {
            android.util.Log.d("FCM", "Token saved to Firestore")
        }
}Token best practices for 2026:
- Always call
getFCMToken()on app startup and save the result — tokens rotate without notice - Store the token server-side associated with the authenticated user ID — not device ID
- Remove the token from your server when the user logs out (or explicitly unsubscribes from notifications)
- Handle the case where multiple devices are registered to the same user — send to all tokens or let users manage notification devices
Step 8 — Topic Subscriptions
Topics let you send to groups of users without managing individual tokens. Subscribe users to topics they care about:
import com.google.firebase.messaging.FirebaseMessaging

// Subscribe to a topic
fun subscribeToTopic(topic: String) {
    FirebaseMessaging.getInstance().subscribeToTopic(topic)
        .addOnCompleteListener { task ->
            if (task.isSuccessful) {
                android.util.Log.d("FCM", "Subscribed to topic: $topic")
            } else {
                android.util.Log.e("FCM", "Subscribe failed: ${task.exception}")
            }
        }
}

// Unsubscribe
fun unsubscribeFromTopic(topic: String) {
    FirebaseMessaging.getInstance().unsubscribeFromTopic(topic)
}

// Usage — subscribe new users to relevant topics
fun setupUserTopics(userPreferences: UserPreferences) {
    subscribeToTopic("all_users")              // Send to everyone
    if (userPreferences.kotlinEnabled) subscribeToTopic("kotlin")
    if (userPreferences.composeEnabled) subscribeToTopic("compose")
    if (userPreferences.firebaseEnabled) subscribeToTopic("firebase")
}Topic names can only contain letters, numbers, hyphens, and underscores. Send to topics from the Firebase Console under Cloud Messaging → Send your first message → Topic.
Step 9 — Test Without a Backend
You don’t need server code to test FCM during development. The Firebase Console lets you send test messages directly.
Method 1 — Firebase Console:
Firebase Console → Cloud Messaging → Create your first campaign
→ Notification title: "Test Notification"
→ Notification text: "Hello from FCM!"
→ Target: Single device → paste your FCM token
→ Send test message
Method 2 — Test with ADB Logcat:
adb logcat | grep -E "FCM|firebase|MyFirebaseMessagingService"Look for onMessageReceived entries. If you see the message in logs but no notification appears, check:
- Your notification channel ID matches what the message specifies
POST_NOTIFICATIONSpermission is granted (check in Settings → Apps → Your App → Notifications)- The notification channel isn’t silenced by the user or system
Method 3 — Send via cURL:
curl -X POST https://fcm.googleapis.com/v1/projects/YOUR_PROJECT_ID/messages:send \
  -H "Authorization: Bearer YOUR_ACCESS_TOKEN" \
  -H "Content-Type: application/json" \
  -d '{
    "message": {
      "token": "YOUR_DEVICE_FCM_TOKEN",
      "notification": {
        "title": "KtDevLog Test",
        "body": "Firebase push notifications working!"
      },
      "data": {
        "action": "new_content",
        "deeplink": "ktdevlog://post/fcm-tutorial"
      }
    }
}'Notification vs Data Message — When to Use Which
| Scenario | Use | Why |
|---|---|---|
| Simple alert to background user | Notification message | FCM shows it automatically |
| Alert with custom action on tap | Notification + Data | Auto-display + custom tap handling |
| Silent background data sync | Data message only | No UI, just your code runs |
| App in foreground — must show notification | Data message | onMessageReceived always fires for data |
| Marketing / promotional alerts | Notification message | Simple, Firebase Console friendly |
| Financial / security alerts | Data message | Full control, never suppressed by FCM |
The most important detail in this table: notification messages are not delivered to onMessageReceived when the app is in the background — FCM handles them directly and shows them automatically. Data messages always reach onMessageReceived regardless of app state. For any notification where you need custom tap handling, deep linking, or guaranteed delivery to your code — use data messages.
Frequently Asked Questions
Android 13+ Permission
Why aren’t my push notifications showing on Android 13?
Android 13 requires the POST_NOTIFICATIONS runtime permission — the user must explicitly grant it. Unlike earlier Android versions, this permission is off by default on fresh installs. Check Settings → Apps → Your App → Notifications to see if notifications are enabled. In code, verify you’ve called the permission request flow using ActivityResultContracts.RequestPermission() with Manifest.permission.POST_NOTIFICATIONS. The FCM SDK includes the manifest declaration automatically (version 23.0.6+), but you must still request the runtime permission from the user.
When should I ask for notification permission?
Request the POST_NOTIFICATIONS permission at a moment when the user already understands why they’d want notifications — not on first launch before they’ve used the app. Good moments: after a user enables notification preferences in your settings screen, after they subscribe to a feature that triggers notifications, or after they complete onboarding. Contextual requests grant rates are significantly higher than blanket first-launch requests.
FCM Setup
What is the difference between notification messages and data messages in FCM?
Notification messages contain notification payload fields (title, body, icon) that FCM displays automatically when the app is in the background. They don’t trigger onMessageReceived() in the background — FCM handles display directly. Data messages contain only a data map of key-value pairs. They always trigger onMessageReceived() regardless of whether the app is foreground, background, or killed. Data messages give your code full control over what to display and when — making them the right choice for financial alerts, deep links, and any notification requiring custom handling.
Why do I need notification channels and what happens if I skip them?
Notification channels are mandatory since Android 8.0 (API 26). If your app attempts to show a notification without first creating the channel it references, the notification is silently dropped — no error, no display. Channels also give users granular control: they can silence a marketing channel while keeping security alerts active. Create your channels in your Application class’s onCreate() method — before any notification can arrive.
How do I manage FCM tokens properly?
Always retrieve and save the FCM token on app startup via FirebaseMessaging.getInstance().token. The onNewToken() callback fires when the token changes — which can happen after reinstall, app data clearing, or a Google-initiated token refresh. Store the current token associated with the authenticated user in your backend or Firestore. When the user logs out, either delete the token from your backend or explicitly call FirebaseMessaging.getInstance().deleteToken() to prevent notifications from reaching a logged-out user.
Conclusion
Firebase push notifications android tutorial covers a lot more ground than “add dependency, receive message” — because 2026 Android push notifications require more than that to actually work reliably on users’ devices.
The critical pieces: create notification channels in your Application class before any notification can arrive. Handle POST_NOTIFICATIONS permission for Android 13+ at a contextual moment, not on first launch. Use onNewToken() to keep your backend token up to date — stale tokens fail silently. Choose data messages over notification messages whenever you need custom tap handling, deep links, or foreground notification control.
With these foundations in place, your app can reach users at exactly the right moment with exactly the right message — which is the whole point of push notifications.
For the backend data layer that pairs naturally with FCM — storing which users have subscribed to which topics, saving notification history, and updating user preferences — the Firestore CRUD operations guide shows the exact patterns for reading and writing that user data from your Android app.
Push notifications that arrive at the right moment feel like magic. Push notifications that arrive at the wrong moment feel like spam. The code is the same — the difference is knowing when to send.