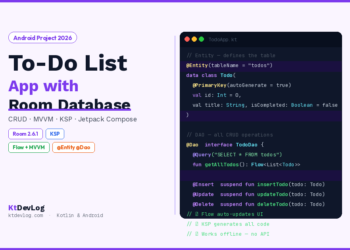

If you’ve been building Android apps for a while, you already know that sooner or later every project needs local data persistence. That means Room Database — Google’s recommended SQLite abstraction for Android. And if you’re building your UI with Jetpack Compose, wiring Room into a Compose project correctly is something every Android developer needs to know how to do properly.
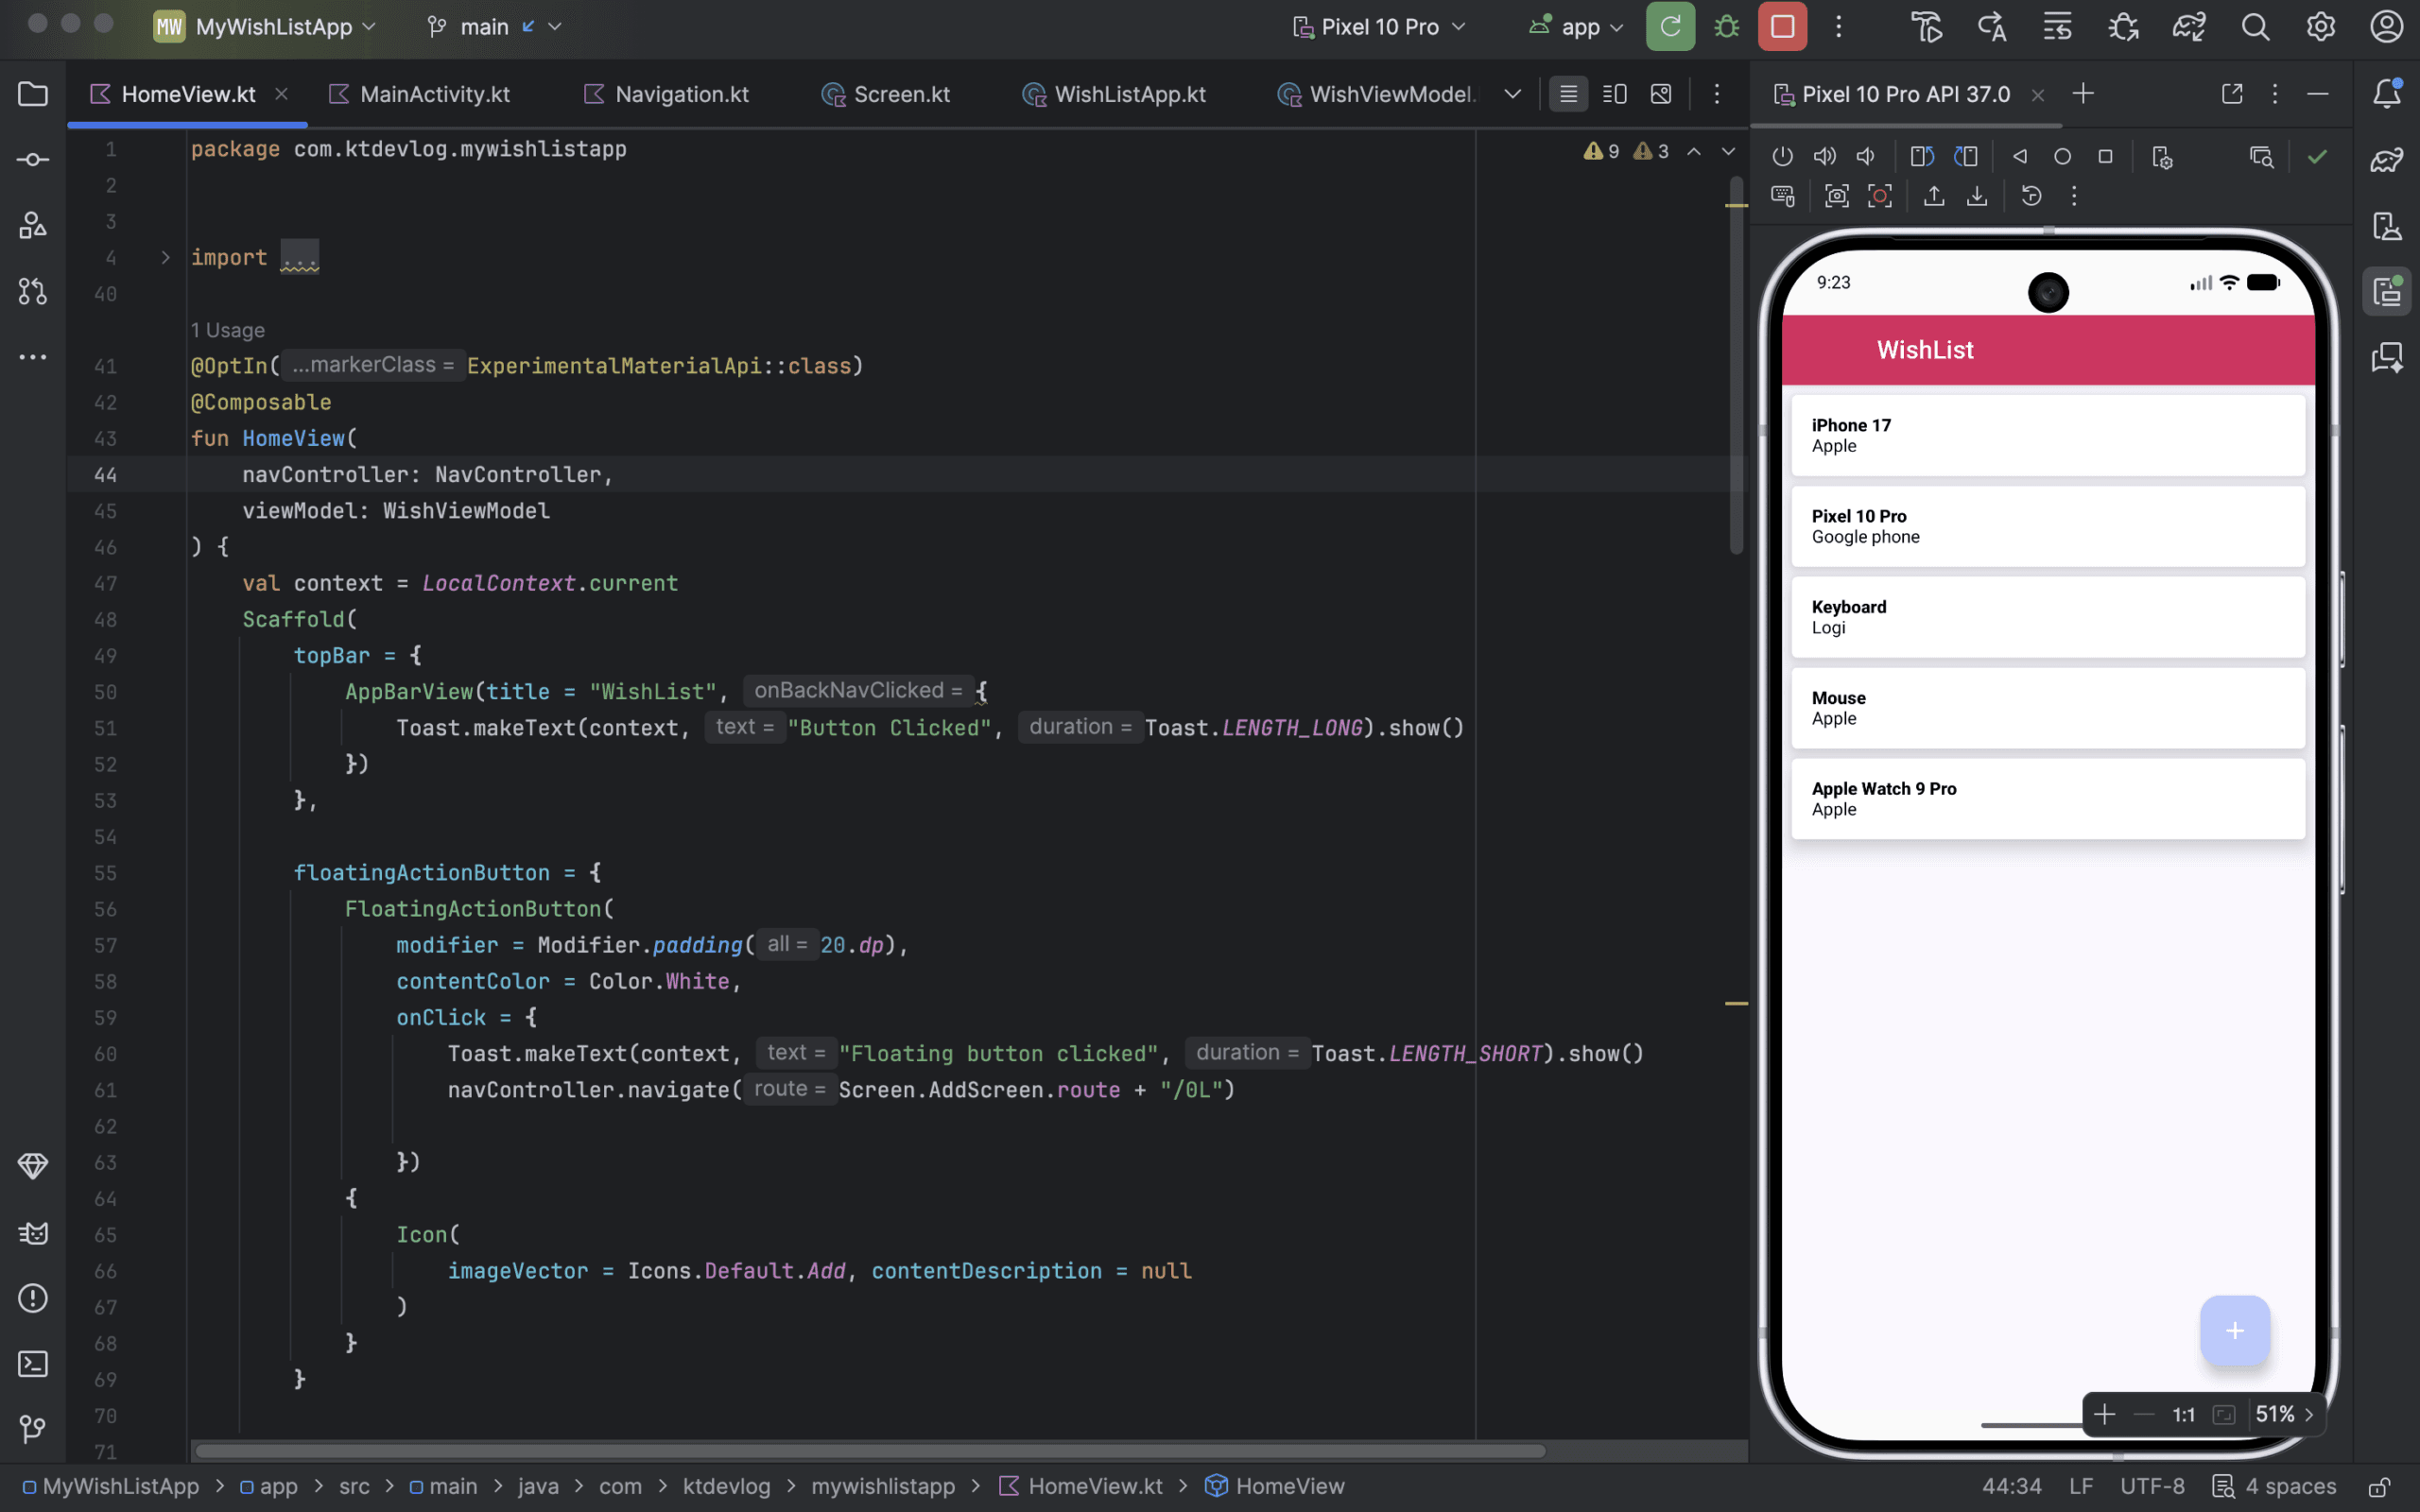
In this tutorial, I’m going to walk you through building a complete Wish List app from scratch — a real, working Android app where users can add wishes, edit them, and delete them with a swipe gesture. Every screen, every database layer, every ViewModel function is covered. By the time you’re done reading, you’ll know exactly how to create a simple app using Room Database with Jetpack Compose and use that pattern in every project going forward.
I built this project myself and ran it on Android Studio Meerkat with compileSdk 37, minSdk 27, Kotlin 2.3.21, and Compose BOM 2026.05.01. Every code snippet here comes directly from the working project — nothing is pseudocode or fabricated. You can find the complete MyWishListApp source code on GitHub and follow along as you read.
Table of Contents
What You’ll Build — App Overview
The Wish List app is a fully functional CRUD (Create, Read, Update, Delete) Android application. Here’s exactly what it does:
- Home screen — shows all saved wishes in a scrollable
LazyColumn. Each wish shows a title and description. Swiping a wish from right to left reveals a red delete background and removes the wish from the database permanently. - Add screen — a form with two text fields (title and description) and a button that saves the wish to Room Database and navigates back to the home screen.
- Edit screen — the same Add screen, but pre-populated with the existing wish data. The button updates the record in the database instead of creating a new one.
- Navigation — handled entirely by Jetpack Compose Navigation. The app passes a
LongID between screens to distinguish between adding (id = 0) and editing (id ≠ 0).
The architecture is clean MVVM: @Entity → @Dao → Database → Repository → ViewModel → Composable UI. This is the exact pattern you’ll use in professional Android projects.
Project Setup and Dependencies
Create a new Android Studio project. Choose Empty Activity, set the language to Kotlin, and set the minimum SDK to 27.
Open your gradle/libs.versions.toml and add the KSP plugin version. Room 2.8.x requires KSP — it no longer supports the older kapt annotation processor:
# gradle/libs.versions.toml
[versions]
agp = "9.2.1"
kotlin = "2.3.21"
ksp = "2.3.8"
composeBom = "2026.05.01"
lifecycleRuntimeKtx = "2.10.0"
activityCompose = "1.13.0"
coreKtx = "1.18.0"

[plugins]
android-application = { id = "com.android.application", version.ref = "agp" }
kotlin-compose = { id = "org.jetbrains.kotlin.plugin.compose", version.ref = "kotlin" }
ksp = { id = "com.google.devtools.ksp", version.ref = "ksp" }Now open your app-level build.gradle.kts:
// app/build.gradle.kts
// Dependencies for Wish List App — Room + Navigation + Compose

plugins {
    alias(libs.plugins.android.application)
    alias(libs.plugins.kotlin.compose)
    alias(libs.plugins.ksp)  // KSP required for Room code generation
}

android {
    namespace = "com.ktdevlog.mywishlistapp"
    compileSdk {
        version = release(37)
    }
    defaultConfig {
        applicationId = "com.ktdevlog.mywishlistapp"
        minSdk = 27
        targetSdk = 37
        versionCode = 1
        versionName = "1.0"
    }
    buildFeatures {
        compose = true
    }
}

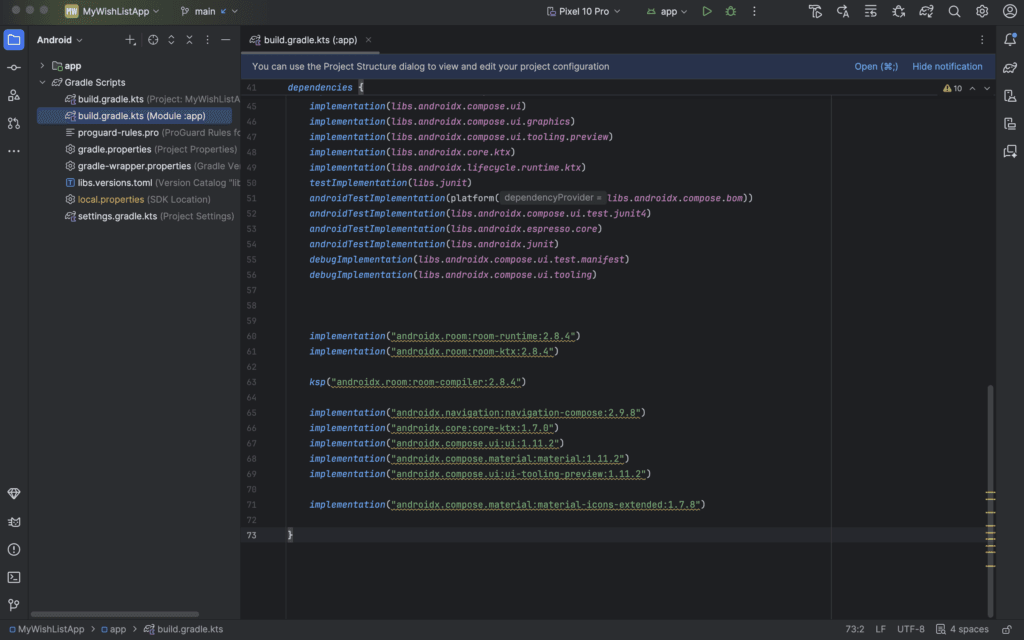
dependencies {
    implementation(platform("androidx.compose:compose-bom:2026.05.01"))
    implementation("androidx.compose.ui:ui")
    implementation("androidx.compose.material3:material3")
    implementation("androidx.compose.ui:ui-tooling-preview")
    implementation("androidx.activity:activity-compose:1.13.0")
    implementation("androidx.lifecycle:lifecycle-runtime-ktx:2.10.0")
    implementation("androidx.core:core-ktx:1.18.0")

    // Room Database — use KSP, not kapt, for Room 2.8.x
    implementation("androidx.room:room-runtime:2.8.4")
    implementation("androidx.room:room-ktx:2.8.4")
    ksp("androidx.room:room-compiler:2.8.4")

    // Jetpack Compose Navigation
    implementation("androidx.navigation:navigation-compose:2.9.8")

    // Legacy Material for SwipeToDismiss — Material3 doesn't have this yet
    implementation("androidx.compose.material:material:1.11.2")
    implementation("androidx.compose.material:material-icons-extended:1.7.8")
}One thing worth knowing up front: this project uses both legacy androidx.compose.material and androidx.compose.material3. The reason is that SwipeToDismiss — the gesture-based delete feature — is available in legacy Material but not yet in Material3 as of 2026. So you’ll see material for SwipeToDismiss and TopAppBar, and material3 for FloatingActionButton and other components. It’s not ideal, but it’s the practical reality of the current Compose ecosystem.
Your AndroidManifest.xml needs one important addition — declaring your custom Application class:
<!-- AndroidManifest.xml -->
<!-- android:name=".WishListApp" registers our custom Application class -->
<!-- Without this, Graph.provide() never runs and the database is never initialized -->
<application
    android:name=".WishListApp"
    android:allowBackup="true"
    android:label="@string/app_name"
    android:theme="@style/Theme.MyWishListApp">
    <activity
        android:name=".MainActivity"
        android:exported="true">
        <intent-filter>
            <action android:name="android.intent.action.MAIN" />
            <category android:name="android.intent.category.LAUNCHER" />
        </intent-filter>
    </activity>
</application>What you should see: Gradle sync completes without errors. If you see “Unresolved reference: ksp”, check that the KSP plugin version matches your Kotlin version — they must be compatible.
Building the Room Database Layer
Room requires three components to work: an @Entity (your data model), a @Dao (your database queries), and a @Database (the database itself). Let’s build each one.
The Entity — Wish.kt
Create a new package called data inside your main package, then create Wish.kt:
// data/Wish.kt
// The Room Entity — maps directly to a table called "wish-table" in the SQLite database

package com.ktdevlog.mywishlistapp.data

import androidx.room.ColumnInfo
import androidx.room.Entity
import androidx.room.PrimaryKey

@Entity(tableName = "wish-table")
data class Wish(
    @PrimaryKey(autoGenerate = true)
    val id: Long = 0L,
    @ColumnInfo(name = "wish-title")
    val title: String = "",
    @ColumnInfo(name = "wish-desc")
    val description: String = ""
)The @Entity annotation tells Room to create a SQLite table for this class. The tableName parameter lets you name the table — here it’s "wish-table" with a hyphen. This is perfectly valid in SQLite, but you’ll need to wrap hyphenated table names in backticks when writing raw queries, like `wish-table`.
@PrimaryKey(autoGenerate = true) tells Room to auto-increment the ID. Setting the default value to 0L means new wishes don’t need an ID — Room assigns one automatically. @ColumnInfo lets you name columns differently from your Kotlin property names, which is useful when you want readable column names in the database without affecting your code.
The DAO — WishDao.kt
// data/WishDao.kt
// Data Access Object — all database queries live here
// WishDao is an abstract class, not an interface — both work with Room

package com.ktdevlog.mywishlistapp.data

import androidx.room.Dao
import androidx.room.Delete
import androidx.room.Insert
import androidx.room.OnConflictStrategy
import androidx.room.Query
import androidx.room.Update
import kotlinx.coroutines.flow.Flow

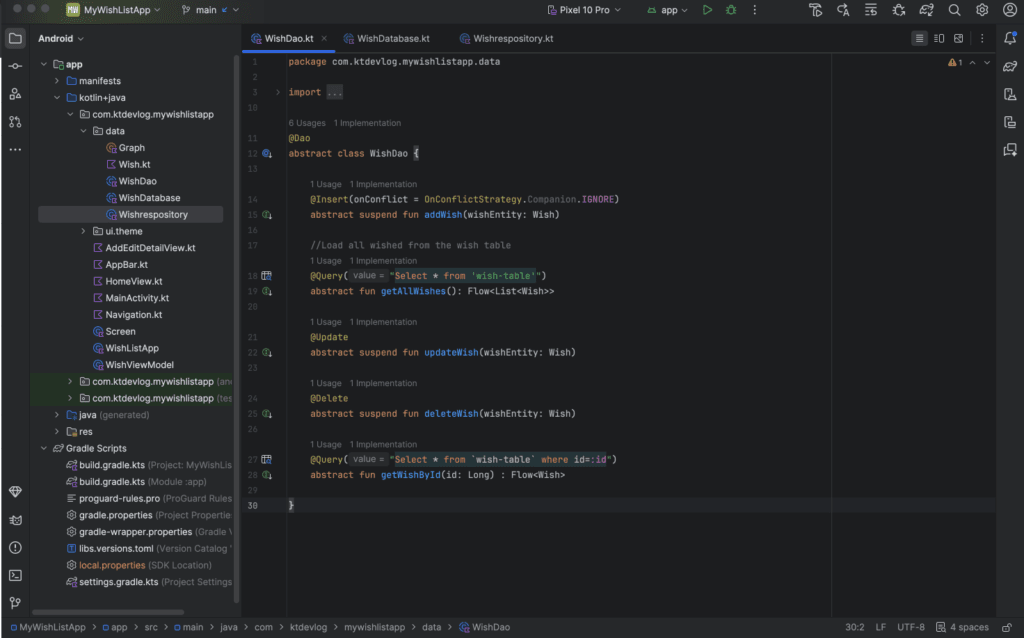
@Dao
abstract class WishDao {

    // IGNORE conflict strategy — silently ignores duplicate primary key insertions
    @Insert(onConflict = OnConflictStrategy.Companion.IGNORE)
    abstract suspend fun addWish(wishEntity: Wish)

    // Returns a Flow — automatically emits a new list whenever the table changes
    // No manual refresh needed — Room handles this reactively
    @Query("Select * from `wish-table`")
    abstract fun getAllWishes(): Flow<List<Wish>>

    @Update
    abstract suspend fun updateWish(wishEntity: Wish)

    @Delete
    abstract suspend fun deleteWish(wishEntity: Wish)

    // Query by ID — also returns Flow for reactive updates
    @Query("Select * from `wish-table` where id=:id")
    abstract fun getWishById(id: Long): Flow<Wish>
}Notice that getAllWishes() and getWishById() return Flow — not a plain List or a suspend function. This is the key to Room’s reactive data pattern. When you insert, update, or delete a wish, Room automatically emits a new value from these Flows. Your UI observes the Flow and recomposes automatically. You never need to manually refresh the list — Room does it for you.
addWish, updateWish, and deleteWish are suspend functions because they perform database writes that must run off the main thread. The Flow-returning functions are regular functions — the coroutine work happens internally when you collect the Flow.
The Database — WishDatabase.kt
// data/WishDatabase.kt
// The Room database — ties everything together
// version = 1 means this is the first schema version
// exportSchema = false skips generating a schema JSON file (fine for simple projects)

package com.ktdevlog.mywishlistapp.data

import androidx.room.Database
import androidx.room.RoomDatabase

@Database(
    entities = [Wish::class],
    version = 1,
    exportSchema = false
)
abstract class WishDatabase : RoomDatabase() {
    abstract fun wishDao(): WishDao
}What you should see: After building the project, Room’s KSP code generation creates implementation classes for WishDao and WishDatabase automatically. You’ll see generated files in your build directory. If you see “error: WishDao must be an abstract class or interface” — check that KSP is applied correctly in your build.gradle.kts.
The Repository Pattern — WishRepository
The repository is a clean abstraction layer between your ViewModel and your DAO. It means your ViewModel doesn’t call Room functions directly — it calls the repository, which calls the DAO. This makes your code testable and follows Android’s recommended app architecture.
// data/Wishrespository.kt
// Repository — single source of truth for all Wish data operations
// The ViewModel never calls the DAO directly — always goes through here

package com.ktdevlog.mywishlistapp.data

import kotlinx.coroutines.flow.Flow

class Wishrespository(
    private val wishDao: WishDao
) {
    suspend fun addWish(wish: Wish) {
        wishDao.addWish(wish)
    }

    // Returns Flow — collected in ViewModel and exposed to UI
    fun getWishes(): Flow<List<Wish>> = wishDao.getAllWishes()

    fun getAWishById(id: Long): Flow<Wish> {
        return wishDao.getWishById(id)
    }

    suspend fun updateAWish(wish: Wish) {
        wishDao.updateWish(wish)
    }

    suspend fun deleteAWish(wish: Wish) {
        wishDao.deleteWish(wish)
    }
}The repository itself has no knowledge of coroutines or threading — it simply delegates to the DAO. Threading decisions (which Dispatcher to use) happen in the ViewModel, where viewModelScope provides the right coroutine context.
Manual Dependency Injection with the Graph Object
Most tutorials jump straight to Hilt for dependency injection. That’s the right call for production apps, but for learning and understanding the basics, a manual DI approach is cleaner. This project uses a Graph object — a singleton that initializes the database and exposes the repository:
// data/Graph.kt
// Manual dependency injection — a simple singleton that holds app-level dependencies
// Graph.provide() must be called before any repository access
// This is called from WishListApp (Application class) in onCreate()

package com.ktdevlog.mywishlistapp.data

import android.content.Context
import androidx.room.Room

object Graph {

    lateinit var database: WishDatabase

    // Lazy initialization — repository is only created when first accessed
    val wishRepository by lazy {
        Wishrespository(wishDao = database.wishDao())
    }

    fun provide(context: Context) {
        database = Room.databaseBuilder(
            context,
            WishDatabase::class.java,
            "wishlist.db"
        ).build()
    }
}Graph.provide() is called from the custom Application class. Using Application context — not Activity context — is critical here. The database must outlive any individual screen or activity, and Application context does exactly that.
// WishListApp.kt
// Custom Application class — registers with android:name=".WishListApp" in the manifest
// Graph.provide() runs before any Activity or ViewModel is created

package com.ktdevlog.mywishlistapp

import android.app.Application
import com.ktdevlog.mywishlistapp.data.Graph

class WishListApp : Application() {
    override fun onCreate() {
        super.onCreate()
        Graph.provide(this)
    }
}Here’s the mistake I made the first time I built this: I forgot to add android:name=".WishListApp" to the <application> block in AndroidManifest.xml. The app compiled and launched without errors, but the moment Graph.wishRepository was accessed — which happens immediately in WishViewModel.init — it crashed with UninitializedPropertyAccessException: lateinit property database has not been initialized. Completely silent until runtime. Don’t skip the manifest declaration.
Building the ViewModel
// WishViewModel.kt
// Manages UI state and all database operations
// Uses Graph.wishRepository directly — acceptable for this architecture pattern

package com.ktdevlog.mywishlistapp

import androidx.compose.runtime.getValue
import androidx.compose.runtime.mutableStateOf
import androidx.compose.runtime.setValue
import androidx.lifecycle.ViewModel
import androidx.lifecycle.viewModelScope
import com.ktdevlog.mywishlistapp.data.Graph
import com.ktdevlog.mywishlistapp.data.Wish
import com.ktdevlog.mywishlistapp.data.Wishrespository
import kotlinx.coroutines.Dispatchers
import kotlinx.coroutines.flow.Flow
import kotlinx.coroutines.launch

class WishViewModel(
    private val wishRepository: Wishrespository = Graph.wishRepository
) : ViewModel() {

    // Compose state for the text fields in AddEditDetailView
    // mutableStateOf triggers recomposition automatically when values change
    var wishTitleState by mutableStateOf("")
    var wishDescriptionSate by mutableStateOf("")

    fun onWishTitleChanged(newString: String) {
        wishTitleState = newString
    }

    fun onWishDescriptionChanged(newString: String) {
        wishDescriptionSate = newString
    }

    // Flow of all wishes — initialized in init block
    // lateinit because Flow is not available until the repository is ready
    lateinit var getAllWishes: Flow<List<Wish>>

    init {
        viewModelScope.launch {
            getAllWishes = wishRepository.getWishes()
        }
    }

    fun addWish(wish: Wish) {
        // Dispatchers.IO moves the database write off the main thread
        viewModelScope.launch(Dispatchers.IO) {
            wishRepository.addWish(wish = wish)
        }
    }

    fun getWishById(id: Long): Flow<Wish> {
        return wishRepository.getAWishById(id)
    }

    fun updateWish(wish: Wish) {
        viewModelScope.launch(Dispatchers.IO) {
            wishRepository.updateAWish(wish = wish)
        }
    }

    fun deleteWish(wish: Wish) {
        viewModelScope.launch(Dispatchers.IO) {
            wishRepository.deleteAWish(wish = wish)
        }
    }
}Notice Dispatchers.IO on all write operations. According to Android’s coroutines best practices documentation, database operations should run on Dispatchers.IO to avoid blocking the main thread. The Flow-returning functions don’t need this — Room’s Flow implementation handles threading internally.
If you want to go deeper on how StateFlow and SharedFlow work compared to the mutableStateOf pattern used here, the Kotlin StateFlow and SharedFlow beginner guide on KtDevLog covers both approaches with clear examples.
Setting Up Navigation with Jetpack Compose
Create Screen.kt to define your route constants as a sealed class:
// Screen.kt
// Sealed class for type-safe navigation routes
// Using a sealed class prevents typos in route strings throughout the app

package com.ktdevlog.mywishlistapp

sealed class Screen(val route: String) {
    object HomeScreen : Screen("home_screen")
    object AddScreen : Screen("add_screen")
}Now create Navigation.kt:
// Navigation.kt
// NavHost setup with two destinations:
// HomeScreen — no arguments
// AddScreen — takes a Long ID argument (0L = add new, non-zero = edit existing)

package com.ktdevlog.mywishlistapp

import androidx.compose.runtime.Composable
import androidx.lifecycle.viewmodel.compose.viewModel
import androidx.navigation.NavHostController
import androidx.navigation.NavType
import androidx.navigation.compose.NavHost
import androidx.navigation.compose.composable
import androidx.navigation.compose.rememberNavController
import androidx.navigation.navArgument

@Composable
fun Navigation(
    viewModel: WishViewModel = viewModel(),
    navController: NavHostController = rememberNavController()
) {
    NavHost(
        navController = navController,
        startDestination = Screen.HomeScreen.route
    ) {
        composable(Screen.HomeScreen.route) {
            HomeView(navController, viewModel)
        }

        // AddScreen route includes /{id} path parameter
        // defaultValue = 0L means: if no id is provided, treat as "add new"
        composable(
            Screen.AddScreen.route + "/{id}",
            arguments = listOf(
                navArgument("id") {
                    type = NavType.LongType
                    defaultValue = 0L
                    nullable = false
                }
            )
        ) { entry ->
            val id = entry.arguments?.getLong("id") ?: 0L
            AddEditDetailView(id = id, viewModel = viewModel, navController = navController)
        }
    }
}The /{id} path parameter pattern is what allows this single route to handle both adding and editing. When the FAB is tapped, the app navigates to add_screen/0L — a new wish. When a wish card is tapped, the app navigates to add_screen/{wish.id} — editing that specific wish. The AddEditDetailView checks the id value to decide which operation to perform.
Building the Home Screen with SwipeToDismiss
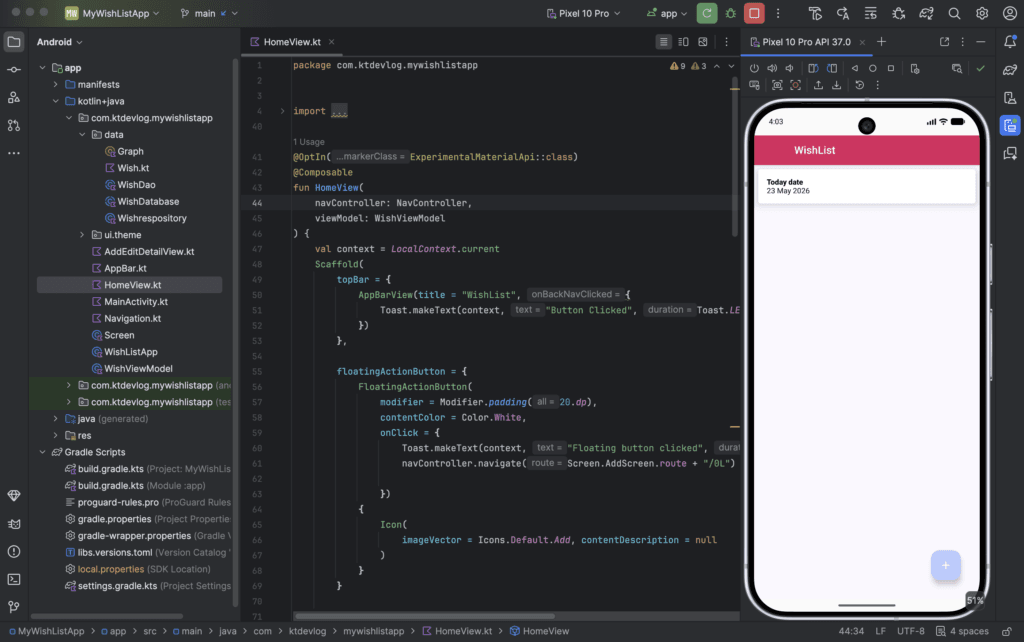
The home screen is the most complex UI in this project. It combines a Scaffold, a LazyColumn, SwipeToDismiss for delete gestures, and a FloatingActionButton for navigation:
// HomeView.kt
// Home screen — shows all wishes, supports swipe-to-delete and tap-to-edit

package com.ktdevlog.mywishlistapp

import android.widget.Toast
import androidx.compose.animation.animateColorAsState
import androidx.compose.foundation.background
import androidx.compose.foundation.clickable
import androidx.compose.foundation.layout.*
import androidx.compose.foundation.lazy.LazyColumn
import androidx.compose.foundation.lazy.items
import androidx.compose.material.*
import androidx.compose.material.icons.Icons
import androidx.compose.material.icons.filled.Add
import androidx.compose.material.icons.filled.Delete
import androidx.compose.material3.FloatingActionButton
import androidx.compose.material3.Icon
import androidx.compose.material3.Scaffold
import androidx.compose.runtime.*
import androidx.compose.ui.Alignment
import androidx.compose.ui.Modifier
import androidx.compose.ui.graphics.Color
import androidx.compose.ui.platform.LocalContext
import androidx.compose.ui.text.font.FontWeight
import androidx.compose.ui.unit.dp
import androidx.navigation.NavController
import com.ktdevlog.mywishlistapp.data.Wish

@OptIn(ExperimentalMaterialApi::class)
@Composable
fun HomeView(
    navController: NavController,
    viewModel: WishViewModel
) {
    val context = LocalContext.current

    Scaffold(
        topBar = {
            AppBarView(title = "WishList") {
                Toast.makeText(context, "Button Clicked", Toast.LENGTH_LONG).show()
            }
        },
        floatingActionButton = {
            FloatingActionButton(
                modifier = Modifier.padding(20.dp),
                contentColor = Color.White,
                onClick = {
                    // Navigate to AddScreen with id = 0L (signals "add new wish")
                    navController.navigate(Screen.AddScreen.route + "/0L")
                }
            ) {
                Icon(imageVector = Icons.Default.Add, contentDescription = "Add wish")
            }
        }
    ) { paddingValues ->

        // collectAsState converts the Flow into Compose State
        // The list recomposes automatically whenever Room emits a new value
        val wishList = viewModel.getAllWishes.collectAsState(initial = listOf())

        LazyColumn(
            modifier = Modifier
                .fillMaxSize()
                .padding(paddingValues)
        ) {
            items(wishList.value, key = { wish -> wish.id }) { wish ->

                val dismissState = rememberDismissState(
                    confirmStateChange = { dismissValue ->
                        if (dismissValue == DismissValue.DismissedToEnd ||
                            dismissValue == DismissValue.DismissedToStart) {
                            viewModel.deleteWish(wish)
                        }
                        true
                    }
                )

                SwipeToDismiss(
                    state = dismissState,
                    // Only allow swiping from right to left (EndToStart)
                    directions = setOf(DismissDirection.EndToStart),
                    dismissThresholds = { FractionalThreshold(0.25f) },
                    background = {
                        // Animate the background color during the swipe gesture
                        val color by animateColorAsState(
                            targetValue = if (dismissState.dismissDirection == DismissDirection.EndToStart)
                                Color.Red else Color.Transparent,
                            label = "swipe_background_color"
                        )
                        Box(
                            modifier = Modifier
                                .fillMaxSize()
                                .background(color)
                                .padding(horizontal = 20.dp),
                            contentAlignment = Alignment.CenterEnd
                        ) {
                            Icon(
                                imageVector = Icons.Default.Delete,
                                contentDescription = "Delete wish",
                                tint = Color.White
                            )
                        }
                    },
                    dismissContent = {
                        WishItem(wish = wish) {
                            // Navigate to AddScreen with the wish's real id (signals "edit")
                            navController.navigate(Screen.AddScreen.route + "/${wish.id}")
                        }
                    }
                )
            }
        }
    }
}

@Composable
fun WishItem(wish: Wish, onClick: () -> Unit) {
    Card(
        modifier = Modifier
            .fillMaxWidth()
            .padding(top = 8.dp, start = 8.dp, end = 8.dp)
            .clickable { onClick() },
        elevation = 10.dp,
        backgroundColor = Color.White
    ) {
        Column(modifier = Modifier.padding(16.dp)) {
            Text(text = wish.title, fontWeight = FontWeight.ExtraBold)
            Text(text = wish.description)
        }
    }
}The key = { wish -> wish.id } parameter in items() is something most tutorials skip but matters a lot for performance. It tells Compose to track each item by its unique database ID rather than by position. Without it, deleting a wish causes the entire list to recompose. With it, only the deleted item’s slot recomposes — a meaningful performance difference on larger lists.
Building the Add and Edit Screen
The Add and Edit screens share a single composable. The id parameter controls which mode is active:
// AddEditDetailView.kt
// Single composable handles both Add (id=0L) and Edit (id != 0L) operations
// AppBar title and button text change dynamically based on id value

package com.ktdevlog.mywishlistapp

import androidx.compose.foundation.layout.*
import androidx.compose.foundation.text.KeyboardOptions
import androidx.compose.material.Scaffold
import androidx.compose.material.rememberScaffoldState
import androidx.compose.material3.Button
import androidx.compose.material3.OutlinedTextField
import androidx.compose.material3.Text
import androidx.compose.runtime.*
import androidx.compose.ui.Alignment
import androidx.compose.ui.Modifier
import androidx.compose.ui.graphics.Color
import androidx.compose.ui.res.stringResource
import androidx.compose.ui.text.TextStyle
import androidx.compose.ui.text.input.KeyboardType
import androidx.compose.ui.unit.dp
import androidx.compose.ui.unit.sp
import androidx.navigation.NavController
import com.ktdevlog.mywishlistapp.data.Wish
import kotlinx.coroutines.launch

@Composable
fun AddEditDetailView(
    id: Long,
    viewModel: WishViewModel,
    navController: NavController
) {
    val snackMessage = remember { mutableStateOf("") }
    val scope = rememberCoroutineScope()
    val scaffoldState = rememberScaffoldState()

    // If editing (id != 0L), load the existing wish and pre-populate the fields
    // If adding (id == 0L), clear the fields so previous input doesn't persist
    if (id != 0L) {
        val wish = viewModel.getWishById(id).collectAsState(initial = Wish(0L, "", ""))
        viewModel.wishTitleState = wish.value.title
        viewModel.wishDescriptionSate = wish.value.description
    } else {
        viewModel.wishTitleState = ""
        viewModel.wishDescriptionSate = ""
    }

    Scaffold(
        topBar = {
            AppBarView(
                // Title changes based on whether we're adding or updating
                title = if (id != 0L) stringResource(id = R.string.update_wish)
                        else stringResource(id = R.string.add_wish)
            ) {
                navController.navigateUp()
            }
        },
        scaffoldState = scaffoldState
    ) { paddingValues ->
        Column(
            modifier = Modifier
                .padding(paddingValues)
                .wrapContentSize(),
            horizontalAlignment = Alignment.CenterHorizontally,
            verticalArrangement = Arrangement.Center
        ) {
            Spacer(modifier = Modifier.height(10.dp))

            WishTextField(
                label = "Title",
                value = viewModel.wishTitleState,
                onValueChanged = { viewModel.onWishTitleChanged(it) }
            )

            Spacer(modifier = Modifier.height(10.dp))

            WishTextField(
                label = "Description",
                value = viewModel.wishDescriptionSate,
                onValueChanged = { viewModel.onWishDescriptionChanged(it) }
            )

            Spacer(modifier = Modifier.height(10.dp))

            Button(onClick = {
                if (viewModel.wishTitleState.isNotEmpty() &&
                    viewModel.wishDescriptionSate.isNotEmpty()) {

                    if (id != 0L) {
                        // UPDATE existing wish — pass the same id back to Room
                        viewModel.updateWish(
                            Wish(
                                id = id,
                                title = viewModel.wishTitleState.trim(),
                                description = viewModel.wishDescriptionSate.trim()
                            )
                        )
                    } else {
                        // ADD new wish — id defaults to 0L, Room auto-generates the real id
                        viewModel.addWish(
                            Wish(
                                title = viewModel.wishTitleState.trim(),
                                description = viewModel.wishDescriptionSate.trim()
                            )
                        )
                        snackMessage.value = "Wish has been created"
                    }
                } else {
                    snackMessage.value = "Enter fields to create a wish"
                }

                scope.launch {
                    scaffoldState.snackbarHostState.showSnackbar(snackMessage.value)
                    navController.navigateUp()
                }
            }) {
                Text(
                    text = if (id != 0L) stringResource(id = R.string.update_wish)
                           else stringResource(id = R.string.add_wish),
                    style = TextStyle(fontSize = 18.sp)
                )
            }
        }
    }
}

@Composable
fun WishTextField(
    label: String,
    value: String,
    onValueChanged: (String) -> Unit
) {
    OutlinedTextField(
        value = value,
        onValueChange = onValueChanged,
        label = { Text(text = label, color = Color.Black) },
        modifier = Modifier.fillMaxWidth(),
        keyboardOptions = KeyboardOptions(keyboardType = KeyboardType.Text)
    )
}The AppBar needs its own file. It shows a back arrow on all screens except the home screen, detected by checking whether the title contains “WishList”:
// AppBar.kt
// Custom TopAppBar using legacy Material (not Material3)
// Shows back navigation icon on all screens except the home screen
// App bar color is #DD1E5F — defined in colors.xml as app_bar_color

package com.ktdevlog.mywishlistapp

import androidx.compose.foundation.layout.heightIn
import androidx.compose.foundation.layout.padding
import androidx.compose.material.Icon
import androidx.compose.material.IconButton
import androidx.compose.material.Text
import androidx.compose.material.TopAppBar
import androidx.compose.material.icons.Icons
import androidx.compose.material.icons.automirrored.filled.ArrowBack
import androidx.compose.runtime.Composable
import androidx.compose.ui.Modifier
import androidx.compose.ui.graphics.Color
import androidx.compose.ui.res.colorResource
import androidx.compose.ui.unit.dp

@Composable
fun AppBarView(
    title: String,
    onBackNavClicked: () -> Unit = {}
) {
    val navigationIcon: (@Composable () -> Unit)? = if (!title.contains("WishList")) {
        {
            IconButton(onClick = { onBackNavClicked() }) {
                Icon(
                    imageVector = Icons.AutoMirrored.Filled.ArrowBack,
                    tint = Color.White,
                    contentDescription = "Navigate back"
                )
            }
        }
    } else null

    TopAppBar(
        title = {
            Text(
                text = title,
                color = colorResource(id = R.color.white),
                modifier = Modifier
                    .padding(start = 4.dp)
                    .heightIn(max = 24.dp)
            )
        },
        elevation = 3.dp,
        backgroundColor = colorResource(id = R.color.app_bar_color),
        navigationIcon = navigationIcon
    )
}Finally, add these color and string resources. In res/values/colors.xml:
<!-- res/values/colors.xml -->
<resources>
    <color name="white">#FFFFFFFF</color>
    <color name="app_bar_color">#DD1E5F</color>
</resources>In res/values/strings.xml:
<!-- res/values/strings.xml -->
<resources>
    <string name="app_name">MyWishListApp</string>
    <string name="update_wish">Update Wish</string>
    <string name="add_wish">Add Wish</string>
</resources>What you should see: The Add screen launches with empty fields and the title “Add Wish”. Tapping a wish card from the home screen opens the same screen with the title “Update Wish” and both fields pre-filled with the existing wish data. Tapping the button shows a snackbar and navigates back to the home screen. The updated or newly added wish appears in the list immediately — because Room’s Flow emits the updated data automatically.
Wiring It All Together in MainActivity
// MainActivity.kt
// Entry point — simply calls Navigation() which sets up the entire NavHost

package com.ktdevlog.mywishlistapp

import android.os.Bundle
import androidx.activity.ComponentActivity
import androidx.activity.compose.setContent
import androidx.activity.enableEdgeToEdge
import androidx.compose.foundation.layout.fillMaxSize
import androidx.compose.foundation.layout.safeDrawingPadding
import androidx.compose.material3.MaterialTheme
import androidx.compose.material3.Surface
import androidx.compose.ui.Modifier
import com.ktdevlog.mywishlistapp.ui.theme.MyWishListAppTheme

class MainActivity : ComponentActivity() {
    override fun onCreate(savedInstanceState: Bundle?) {
        super.onCreate(savedInstanceState)
        enableEdgeToEdge()
        setContent {
            MyWishListAppTheme {
                Surface(
                    modifier = Modifier
                        .fillMaxSize()
                        .safeDrawingPadding(),
                    color = MaterialTheme.colorScheme.background
                ) {
                    Navigation()
                }
            }
        }
    }
}safeDrawingPadding() handles the system bars for edge-to-edge display — the correct approach in 2026 for apps targeting SDK 37. Always test in your own environment before using in production.
Common Errors and Fixes
UninitializedPropertyAccessException: lateinit property database has not been initialized You forgot to add android:name=".WishListApp" to the <application> block in AndroidManifest.xml. Without it, Graph.provide() never runs and the database is never initialized. This is the most common crash when first setting up this architecture.
error: Symbol not found: OnConflictStrategy.IGNORE You’re using an older import path. In Room 2.8.x with KSP, the correct reference is OnConflictStrategy.Companion.IGNORE. Update your import and usage accordingly.
Cannot find symbol: WishDaoImpl or similar KSP generation errors KSP version must be compatible with your Kotlin version. For Kotlin 2.3.21, use KSP 2.3.8. Check your libs.versions.toml and confirm both versions match. A clean build often resolves stale KSP artifacts.
Swipe to dismiss triggers on both directions The directions parameter in SwipeToDismiss must be set to setOf(DismissDirection.EndToStart) only. Without this, swiping left or right both trigger deletion. The default allows both directions.
Room crashes on main thread: IllegalStateException: Cannot access database on the main thread You called a suspend DAO function outside a coroutine, or forgot Dispatchers.IO. All Room write operations must run with viewModelScope.launch(Dispatchers.IO) as shown in WishViewModel. For older Room versions, you can add .allowMainThreadQueries() to the database builder — but don’t do this in production.
Navigation: app navigates but the edit screen shows empty fields The id is being passed as "0L" (a string with the letter L) instead of 0 (a plain Long). When navigating to the add screen, use Screen.AddScreen.route + "/0L" for new wishes and Screen.AddScreen.route + "/${wish.id}" for existing ones. The navArgument type is NavType.LongType — it correctly parses both formats.
FAQ
What is the difference between Room and SQLite in Android?
Room is Google’s recommended database library for Android and sits on top of SQLite. Raw SQLite requires you to write all SQL queries manually, manage cursor objects, and handle threading yourself. Room uses annotations (@Entity, @Dao, @Database) to generate all of this boilerplate code automatically at compile time via KSP. Room also integrates natively with Kotlin Flow and coroutines, making reactive data patterns straightforward. According to the official Android documentation, Room is the recommended approach for all new Android projects requiring local persistence.
Why does WishDao use an abstract class instead of an interface?
Both work equally well with Room — the choice is purely stylistic. An abstract class allows you to add concrete helper functions alongside your abstract DAO methods if needed. An interface is simpler and more idiomatic Kotlin. This project uses abstract class but you can switch to interface without changing anything else — Room generates the implementation either way.
How does the Flow from Room update the UI automatically?
When you call getAllWishes() from the DAO, Room returns a Flow<List<Wish>>. Every time a row is inserted, updated, or deleted in the wish-table, Room automatically emits a new list through this Flow. In the ViewModel, getAllWishes holds this Flow. In the Composable, .collectAsState() converts the Flow into Compose State, which triggers recomposition whenever a new value is emitted. The entire chain — database change → Flow emission → State update → UI recomposition — happens automatically without any manual refresh logic.
Can I use Hilt instead of the Graph object for dependency injection?
Yes — and for production apps, Hilt is the recommended approach. The Graph object pattern used in this tutorial is intentional for learning purposes. It makes the dependency flow explicit and easy to follow without the additional complexity of Hilt annotations. Once you understand how Repository gets its DAO and how ViewModel gets its Repository, migrating to Hilt is straightforward. The Firebase Authentication Android tutorial on KtDevLog uses a similar manual DI approach if you want to see another example of this pattern.
How do I add more fields to the Wish entity later?
Add the new property to the Wish data class with @ColumnInfo and increment the version number in @Database. You’ll also need to provide a Migration object to Room.databaseBuilder() — otherwise Room will crash on existing installations. For development when you don’t care about preserving data, .fallbackToDestructiveMigration() on the database builder rebuilds the database from scratch on version changes. Never use fallbackToDestructiveMigration() in a production app — it deletes all user data.
What You’ve Built — and Where to Go Next
You now have a complete Android app built with Room Database and Jetpack Compose — a real CRUD application with proper MVVM architecture, reactive data flow using Flow, navigation between screens, and swipe-to-delete gesture support. Every layer of the stack is clean, intentional, and ready to extend.
The patterns you’ve learned here — @Entity → @Dao → @Database → Repository → ViewModel → Composable — are the exact same patterns used in every serious Android project. Master this stack and you can build almost anything.
The natural next step is adding Firebase Authentication to this project — so users can log in and have their wish lists tied to their account rather than just stored locally. That’s exactly what the Firebase Authentication Android tutorial covers on KtDevLog. If you want to understand the coroutine patterns used throughout this tutorial more deeply, the Kotlin Coroutines vs Threads guide is the right next read.
Building with Room and Compose takes a few more files than a quick tutorial might suggest — but every file has a clear, single responsibility. Once you’ve built this once, the architecture becomes second nature.
Always test in your own environment before using in production.